c. Manage instances of IBM Bluemix PaaS data services: Cloudant NoSQL Database, dashDB, and SQL Database.
1. Manage instances of the Cloudant NoSQL DB service
Once an instance of the Cloudant NoSQL database service has been created in IBM Bluemix you can use the provided web interface to administer the database.
A set of hands-on steps are provided to show some key concepts of managing the Cloudant NoSQL DB service.
Launch the Cloudant NoSQL administration tool
Click on the hexagon for your instance of Cloudant NoSQL database service by clicking on its hexagon from the Bluemix Dashboard.

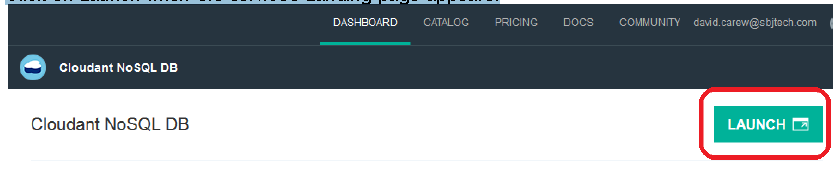
Click on Launch when the services Landing page appears:
 a. Create a database
From the Cloudant Administration Tool click on Add New Database, enter the name that you want
for the new database and click Create.
Note that the must start with a lowercase letter and contain only the following characters:
o Lowercase characters (a-z)
o Digits (0-9)
o Any of the characters _, $, (, ), +, -, and /

You’ll be taken to the administration screen for the new database.
b. Add data to an existing database
From the home page of the Cloudant Administration tool click on the link for the database that you want to administer:

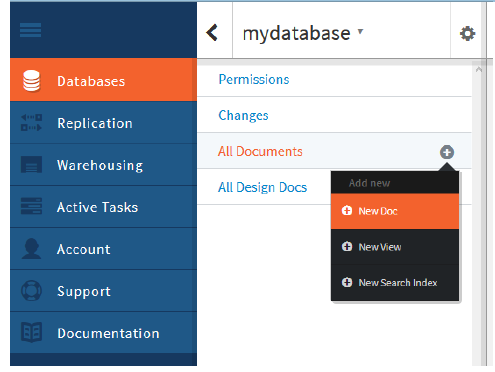
Click on the + icon next to All Documents and select New Doc from the context menu:
A new JSON document appears with a single attribute name _id. This is the unique identifier for your new document. You can accept the generated value or put it your own. Add the additional fields to the document.
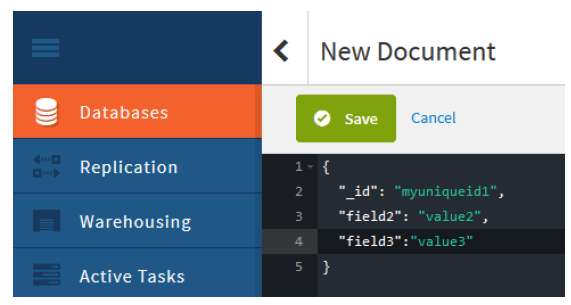
When you’re done click Save to save the changes.
c. Edit documents in an existing database
From the home page of the Cloudant Administration tool click on the link for the database that you want to administer.
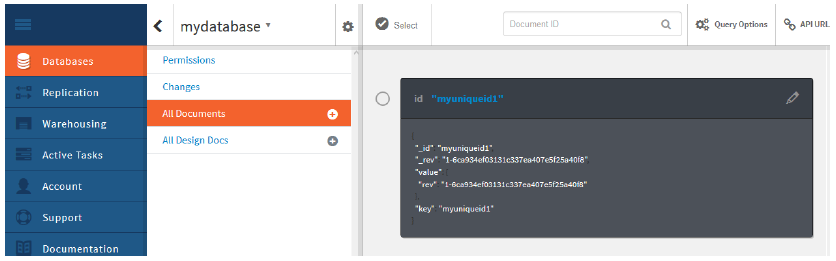
Click on All Documents, a summary of the documents in the database appears on the right:

Click on the pencil icon to edit the documents and then make your required changes.

Click Save to save your changes.
d. Clone existing documents
From the home page of the Cloudant Administration tool click on the link for the database that you want to administer.
Click on All Documents, a summary of the documents in the database appears on the right:

Click on the pencil icon of the document you want to clone.
Click on Clone Document in the document editor:

You’ll be prompted accept a system generated unique id for the new clone or to provide a unique id of your choice:

Change the ID to something unique (or accept the generated one) and click Clone. You’ll be taken to a document editor with the clone of the original document which is identical to the original (except for the _id and _rev fields):

e. Simple query of all documents in an existing database
From the home page of the Cloudant Administration tool click on the link for the database that you want to administer.
Click on All Documents, a summary of the documents in the database appears on the right.
To see the complete documents click on Query Options, select Include Docs and click Query:

All fields in all your documents will appear.

2. Manage instances of dashDB service
Once an instance of the dashDB service has been created in IBM Bluemix you can use the provided web interface to administer it. There are many features in the tool including the capability to load
CSV data, load Geospatial data and to sync from an existing Cloudant database.
A set of hands-on steps are provided to show some key concepts of managing the dashDB service.
Launch the dashDB administration tool
Click on the hexagon for your instance of the dashDB service by clicking on its hexagon from the Bluemix Dashboard:

Click on Launch when the service’s landing page appears:

a. Create a new table in dashDB
From the dashDB Administration tool landing page select Manage->Work with tables:

Click on the + icon to enter the SQL DDL to create a new table. (Note dashDB uses DB2 10.5 SQL syntax). Don’t specify a new schema name as the dashDB user that has been created for you does not have CREATE SCHEMA authority. Leaving the schema name out altogether will create the table with the default schema.
 After you entered the DDL to create the table, click Run DDL to create the table. A dialog will appear indicating that the table was successfully created:

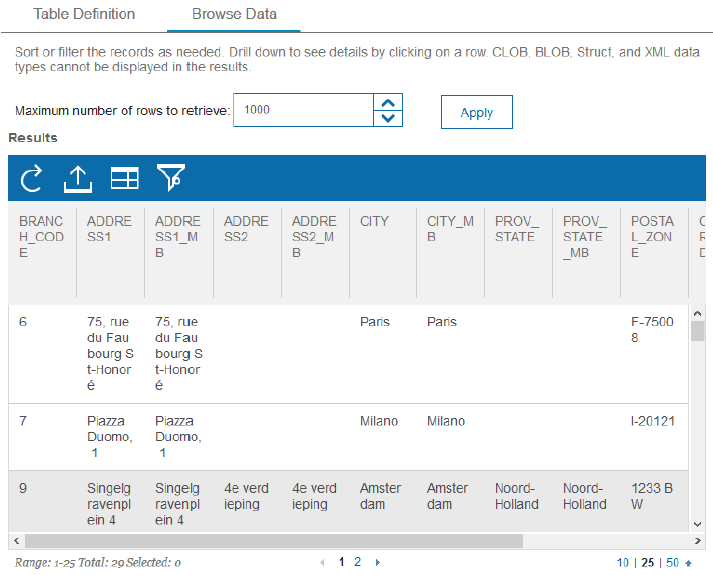
b. Browse the contents of an existing table in dashDB
From the dashDB Administration tool landing page select Manage->Work with tables.
Several sample tables have already been created for you. Select GOSALES as the schema and BRANCH as the table. Click Browse Data:
 The first 1000 rows of data will be returned.

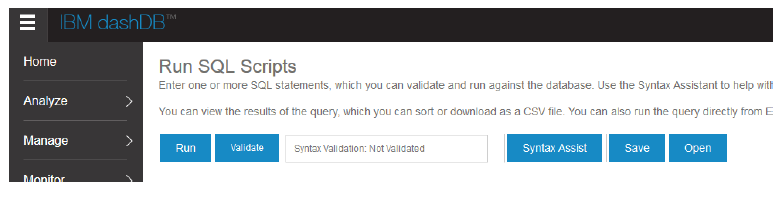
c. Run SQL scripts in dashDB
You can run SQL script in dashDB with the Administration tool. The tool provides a Validate button to verify that your script is valid SQL, there is also a Syntax Assist button will guide you through the creation of common SQL query types and a Run button that will run the scripts, Scripts can be named and saved for future use.
 To run SQL script, select Manage->Run SQL Scripts from the dashDB Administration tool landing page:

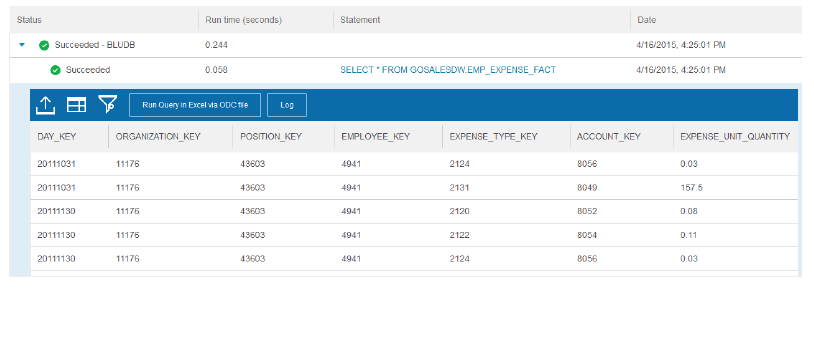
An SQL script querying some of the sample data will be preloaded for you. Click on Run to see the results of running the script.

d. Import CSV data into dashDB
You can import CSV data into dashDB via the administration console.
The website http://data.gov maintains a CSV file containing all the current complaints filed by citizens to the Consumer Financial Protection Bureau. Download the file
https://data.consumerfinance.gov/api/views/s6ew-h6mp/rows.csv?accessType=DOWNLOAD
to your local machine. The default name is Consumer_Complaints.csv
From the dashDB Administration tool landing page select Manage->Load Data.

Click on Browse to select the Consumer_Complaints.csv file and then click on Load File:

Click Next
Select Create a new table and load and click Next:

Click Finish to load the data. A preview of the data in the new table will appear as well as the number of rows imported.

3. Manage instances of SQL Database services
Once an instance of the SQL Database service has been created in IBM Bluemix you can use the provided web interface to administer it. There are many features in the tool including the capability to load CSV data, to create tables and to run SQL queries against the tables in the database.
A set of hands-on steps are provided to show some key concepts of managing the SQL Database service.
Launch the SQL Database administration tool
Click on the hexagon for your instance of the SQL Database service by clicking on its hexagon from the Bluemix Dashboard:

Click on Launch when the service’s landing page appears:

a. Create a new table in SQL Database
From the SQL Database Administration tool landing page click on Work with tables.
Click on the + icon to enter the SQL DDL to create a new table. (Note SQL Database uses DB2 10.5 SQL syntax). Enter the DDL to create the table and insert one row into to it. Note: If your instance is on the free plan, you can’t specify a new schema name as the user that has been created for you does not have CREATE SCHEMA authority.
With the Small and Premium plans you can create additional schemas. With all plans leaving the schema name out altogether will create the table with the default schema that is automatically generated for each instance of the service.
 After you entered the DDL to create the table and insert a row, click Run DDL to create the table.
A dialog will appear indicating that the table was successfully created.
b. Browse the contents of an existing table in SQL Database
From the SQL Database Administration tool landing page select Manage->Work with tables:
Select your schema and one of your tables. Click Browse Data:

The first 1000 rows of data will be returned.
 c. Run SQL SELECT Queries in SQL Database
From the SQL Database Administration tool landing page click on the tab Run Query.
Click Select Table and Columns to select one of your tables by first selecting the schema name followed by the table name.

Click Apply. The query should now be selecting all the rows and columns in the table you selected.

Click on the Run Query button to run the query. The query result should be returned:

d. Import CSV data into SQL Database
You can import CSV data into SQL Database via the administration console.
The website http://data.gov maintains a CSV file containing all the current complaints filed by citizens to the Consumer Financial Protection Bureau. Download the file
https://data.consumerfinance.gov/api/views/s6ew-h6mp/rows.csv?accessType=DOWNLOAD to your local machine. The default name is Consumer_Complaints.csv
From the SQL Database Administration tool landing page click on Load Data. Click on Browse to select the Consumer_Complaints.csv file and then click on Load File:

Click Next.
Select Create a new table and load and click Next.

Click Finish to load the data. A preview of the data in the new table will appear as well as the number of rows imported.

1. Manage instances of the Cloudant NoSQL DB service
Once an instance of the Cloudant NoSQL database service has been created in IBM Bluemix you can use the provided web interface to administer the database.
A set of hands-on steps are provided to show some key concepts of managing the Cloudant NoSQL DB service.
Launch the Cloudant NoSQL administration tool
Click on the hexagon for your instance of Cloudant NoSQL database service by clicking on its hexagon from the Bluemix Dashboard.
Click on Launch when the services Landing page appears:
From the Cloudant Administration Tool click on Add New Database, enter the name that you want
for the new database and click Create.
Note that the must start with a lowercase letter and contain only the following characters:
o Lowercase characters (a-z)
o Digits (0-9)
o Any of the characters _, $, (, ), +, -, and /

You’ll be taken to the administration screen for the new database.
b. Add data to an existing database
From the home page of the Cloudant Administration tool click on the link for the database that you want to administer:

Click on the + icon next to All Documents and select New Doc from the context menu:
A new JSON document appears with a single attribute name _id. This is the unique identifier for your new document. You can accept the generated value or put it your own. Add the additional fields to the document.
When you’re done click Save to save the changes.
c. Edit documents in an existing database
From the home page of the Cloudant Administration tool click on the link for the database that you want to administer.
Click on All Documents, a summary of the documents in the database appears on the right:
Click on the pencil icon to edit the documents and then make your required changes.

Click Save to save your changes.
d. Clone existing documents
From the home page of the Cloudant Administration tool click on the link for the database that you want to administer.
Click on All Documents, a summary of the documents in the database appears on the right:

Click on the pencil icon of the document you want to clone.
Click on Clone Document in the document editor:

You’ll be prompted accept a system generated unique id for the new clone or to provide a unique id of your choice:
Change the ID to something unique (or accept the generated one) and click Clone. You’ll be taken to a document editor with the clone of the original document which is identical to the original (except for the _id and _rev fields):

e. Simple query of all documents in an existing database
From the home page of the Cloudant Administration tool click on the link for the database that you want to administer.
Click on All Documents, a summary of the documents in the database appears on the right.
To see the complete documents click on Query Options, select Include Docs and click Query:

All fields in all your documents will appear.

2. Manage instances of dashDB service
Once an instance of the dashDB service has been created in IBM Bluemix you can use the provided web interface to administer it. There are many features in the tool including the capability to load
CSV data, load Geospatial data and to sync from an existing Cloudant database.
A set of hands-on steps are provided to show some key concepts of managing the dashDB service.
Launch the dashDB administration tool
Click on the hexagon for your instance of the dashDB service by clicking on its hexagon from the Bluemix Dashboard:

Click on Launch when the service’s landing page appears:

a. Create a new table in dashDB
From the dashDB Administration tool landing page select Manage->Work with tables:

Click on the + icon to enter the SQL DDL to create a new table. (Note dashDB uses DB2 10.5 SQL syntax). Don’t specify a new schema name as the dashDB user that has been created for you does not have CREATE SCHEMA authority. Leaving the schema name out altogether will create the table with the default schema.
b. Browse the contents of an existing table in dashDB
From the dashDB Administration tool landing page select Manage->Work with tables.
Several sample tables have already been created for you. Select GOSALES as the schema and BRANCH as the table. Click Browse Data:

c. Run SQL scripts in dashDB
You can run SQL script in dashDB with the Administration tool. The tool provides a Validate button to verify that your script is valid SQL, there is also a Syntax Assist button will guide you through the creation of common SQL query types and a Run button that will run the scripts, Scripts can be named and saved for future use.
An SQL script querying some of the sample data will be preloaded for you. Click on Run to see the results of running the script.
d. Import CSV data into dashDB
You can import CSV data into dashDB via the administration console.
The website http://data.gov maintains a CSV file containing all the current complaints filed by citizens to the Consumer Financial Protection Bureau. Download the file
https://data.consumerfinance.gov/api/views/s6ew-h6mp/rows.csv?accessType=DOWNLOAD
to your local machine. The default name is Consumer_Complaints.csv
From the dashDB Administration tool landing page select Manage->Load Data.
Click on Browse to select the Consumer_Complaints.csv file and then click on Load File:

Click Next
Select Create a new table and load and click Next:

Click Finish to load the data. A preview of the data in the new table will appear as well as the number of rows imported.

3. Manage instances of SQL Database services
Once an instance of the SQL Database service has been created in IBM Bluemix you can use the provided web interface to administer it. There are many features in the tool including the capability to load CSV data, to create tables and to run SQL queries against the tables in the database.
A set of hands-on steps are provided to show some key concepts of managing the SQL Database service.
Launch the SQL Database administration tool
Click on the hexagon for your instance of the SQL Database service by clicking on its hexagon from the Bluemix Dashboard:
Click on Launch when the service’s landing page appears:

a. Create a new table in SQL Database
From the SQL Database Administration tool landing page click on Work with tables.
Click on the + icon to enter the SQL DDL to create a new table. (Note SQL Database uses DB2 10.5 SQL syntax). Enter the DDL to create the table and insert one row into to it. Note: If your instance is on the free plan, you can’t specify a new schema name as the user that has been created for you does not have CREATE SCHEMA authority.
With the Small and Premium plans you can create additional schemas. With all plans leaving the schema name out altogether will create the table with the default schema that is automatically generated for each instance of the service.

A dialog will appear indicating that the table was successfully created.
b. Browse the contents of an existing table in SQL Database
From the SQL Database Administration tool landing page select Manage->Work with tables:
Select your schema and one of your tables. Click Browse Data:

The first 1000 rows of data will be returned.

From the SQL Database Administration tool landing page click on the tab Run Query.
Click Select Table and Columns to select one of your tables by first selecting the schema name followed by the table name.

Click Apply. The query should now be selecting all the rows and columns in the table you selected.

Click on the Run Query button to run the query. The query result should be returned:

d. Import CSV data into SQL Database
You can import CSV data into SQL Database via the administration console.
The website http://data.gov maintains a CSV file containing all the current complaints filed by citizens to the Consumer Financial Protection Bureau. Download the file
https://data.consumerfinance.gov/api/views/s6ew-h6mp/rows.csv?accessType=DOWNLOAD to your local machine. The default name is Consumer_Complaints.csv
From the SQL Database Administration tool landing page click on Load Data. Click on Browse to select the Consumer_Complaints.csv file and then click on Load File:

Click Next.
Select Create a new table and load and click Next.

Click Finish to load the data. A preview of the data in the new table will appear as well as the number of rows imported.


0 comments:
Post a Comment