In Amazon ECS, you have always had the benefit of being able to use IAM roles for Amazon EC2
in order to simplify API requests from your containers. This also
allows you to follow AWS best practices by not storing your AWS
credentials in your code or configuration files, as well as providing
benefits such as automatic key rotation.
For example, roles let you build systems for secret management using ECS and Amazon S3, use Amazon DynamoDB for state management, or use S3 to store artifacts generated or used by your containers, all without having to deal with AWS credentials in your code.
Previously, you had to use IAM roles for Amazon EC2, meaning the IAM policies you assigned to the EC2 instances in your ECS cluster had to contain all the IAM policies for the tasks performed within the same cluster. This means that if you had one container that needed access to a specific S3 bucket and another container that needed access to a DynamoDB table, you had to assign both IAM permissions to the same EC2 instance.
With the introduction of the newly-launched IAM roles for ECS tasks, you can now secure your infrastructure further by assigning an IAM role directly to the ECS task rather than to the EC2 container instance. This way, you can have one task that uses a specific IAM role for access to S3 and one task that uses an IAM role to access a DynamoDB table.
This feature also allows you to use a minimal IAM policy for the ECS cluster instances because you only need to give the tasks a few required IAM permissions to interact with the ECS service.
This post walks you through setting up a task IAM role.
If you have an existing cluster, use the ECS Optimized AMI 2016.03.e and the SDK released on July 13, 2016 or later to access this feature.
This creates a directory named aws-nodejs-sample in your current directory that contains the code for the sample app. In the same directory, create a Dockerfile file, paste the following text into it, and save it.

For Task Role, select the IAM role that you created before and choose Create to create the task definition.

On the Task Definition page, select the revision you just created e.g., aws-nodejs-sample:1 and choose Actions, Run Task. Select your ECS cluster from the list and choose Run Task on the next screen to launch a task on your ECS cluster.
Open the Amazon S3 console and verify that a bucket has been created and that it contains the
This also simplifies ECS cluster management, as you now have more freedom in bundling your tasks together on the same cluster instances. Keep in mind that you still need to handle security groups on a per-instance basis but you can now be very granular when creating and assigning IAM policies.
For example, roles let you build systems for secret management using ECS and Amazon S3, use Amazon DynamoDB for state management, or use S3 to store artifacts generated or used by your containers, all without having to deal with AWS credentials in your code.
Previously, you had to use IAM roles for Amazon EC2, meaning the IAM policies you assigned to the EC2 instances in your ECS cluster had to contain all the IAM policies for the tasks performed within the same cluster. This means that if you had one container that needed access to a specific S3 bucket and another container that needed access to a DynamoDB table, you had to assign both IAM permissions to the same EC2 instance.
With the introduction of the newly-launched IAM roles for ECS tasks, you can now secure your infrastructure further by assigning an IAM role directly to the ECS task rather than to the EC2 container instance. This way, you can have one task that uses a specific IAM role for access to S3 and one task that uses an IAM role to access a DynamoDB table.
This feature also allows you to use a minimal IAM policy for the ECS cluster instances because you only need to give the tasks a few required IAM permissions to interact with the ECS service.
This post walks you through setting up a task IAM role.
Prerequisites
If you haven’t yet done so, create an ECS cluster and launch at least one EC2 instance in the cluster. When you launch your EC2 instances, for the Container instance IAM role, choose an IAM role that has the AmazonEC2ContainerServiceforEC2Role policy attached to it.If you have an existing cluster, use the ECS Optimized AMI 2016.03.e and the SDK released on July 13, 2016 or later to access this feature.
Walkthrough
For this walkthrough, you use a simple Node.js application that creates an Amazon S3 bucket and uploads a ‘Hello World’ file. You can find the source code for the application on the aws-nodejs-sample GitHub repository.Build and push the Docker image
From your terminal application, execute the following command:$ git clone https://github.com/awslabs/aws-nodejs-sample
This creates a directory named aws-nodejs-sample in your current directory that contains the code for the sample app. In the same directory, create a Dockerfile file, paste the following text into it, and save it.
FROM node:argon

# Create app directory
RUN mkdir -p /usr/src/app
WORKDIR /usr/src/app

# Install app dependencies
COPY package.json /usr/src/app/
RUN npm install

# Bundle app source
COPY sample.js /usr/src/app

CMD [ "node", "sample.js" ]
Create a repository on Amazon ECR named aws-nodejs-sample to store your image. Run the following commands to build and push your Docker image to your ECR repository, making sure to replace the AWS region and account ID with appropriate values.
$ docker build -t aws-nodejs-sample .

$ aws ecr get-login --region us-west-2 | sh

$ docker tag aws-nodejs-sample:latest 123456789012.dkr.ecr.us-west-2.amazonaws.com/aws-nodejs-sample:v1

$ docker push 123456789012.dkr.ecr.us-west-2.amazonaws.com/aws-nodejs-sample:v1
Create an IAM role for the task
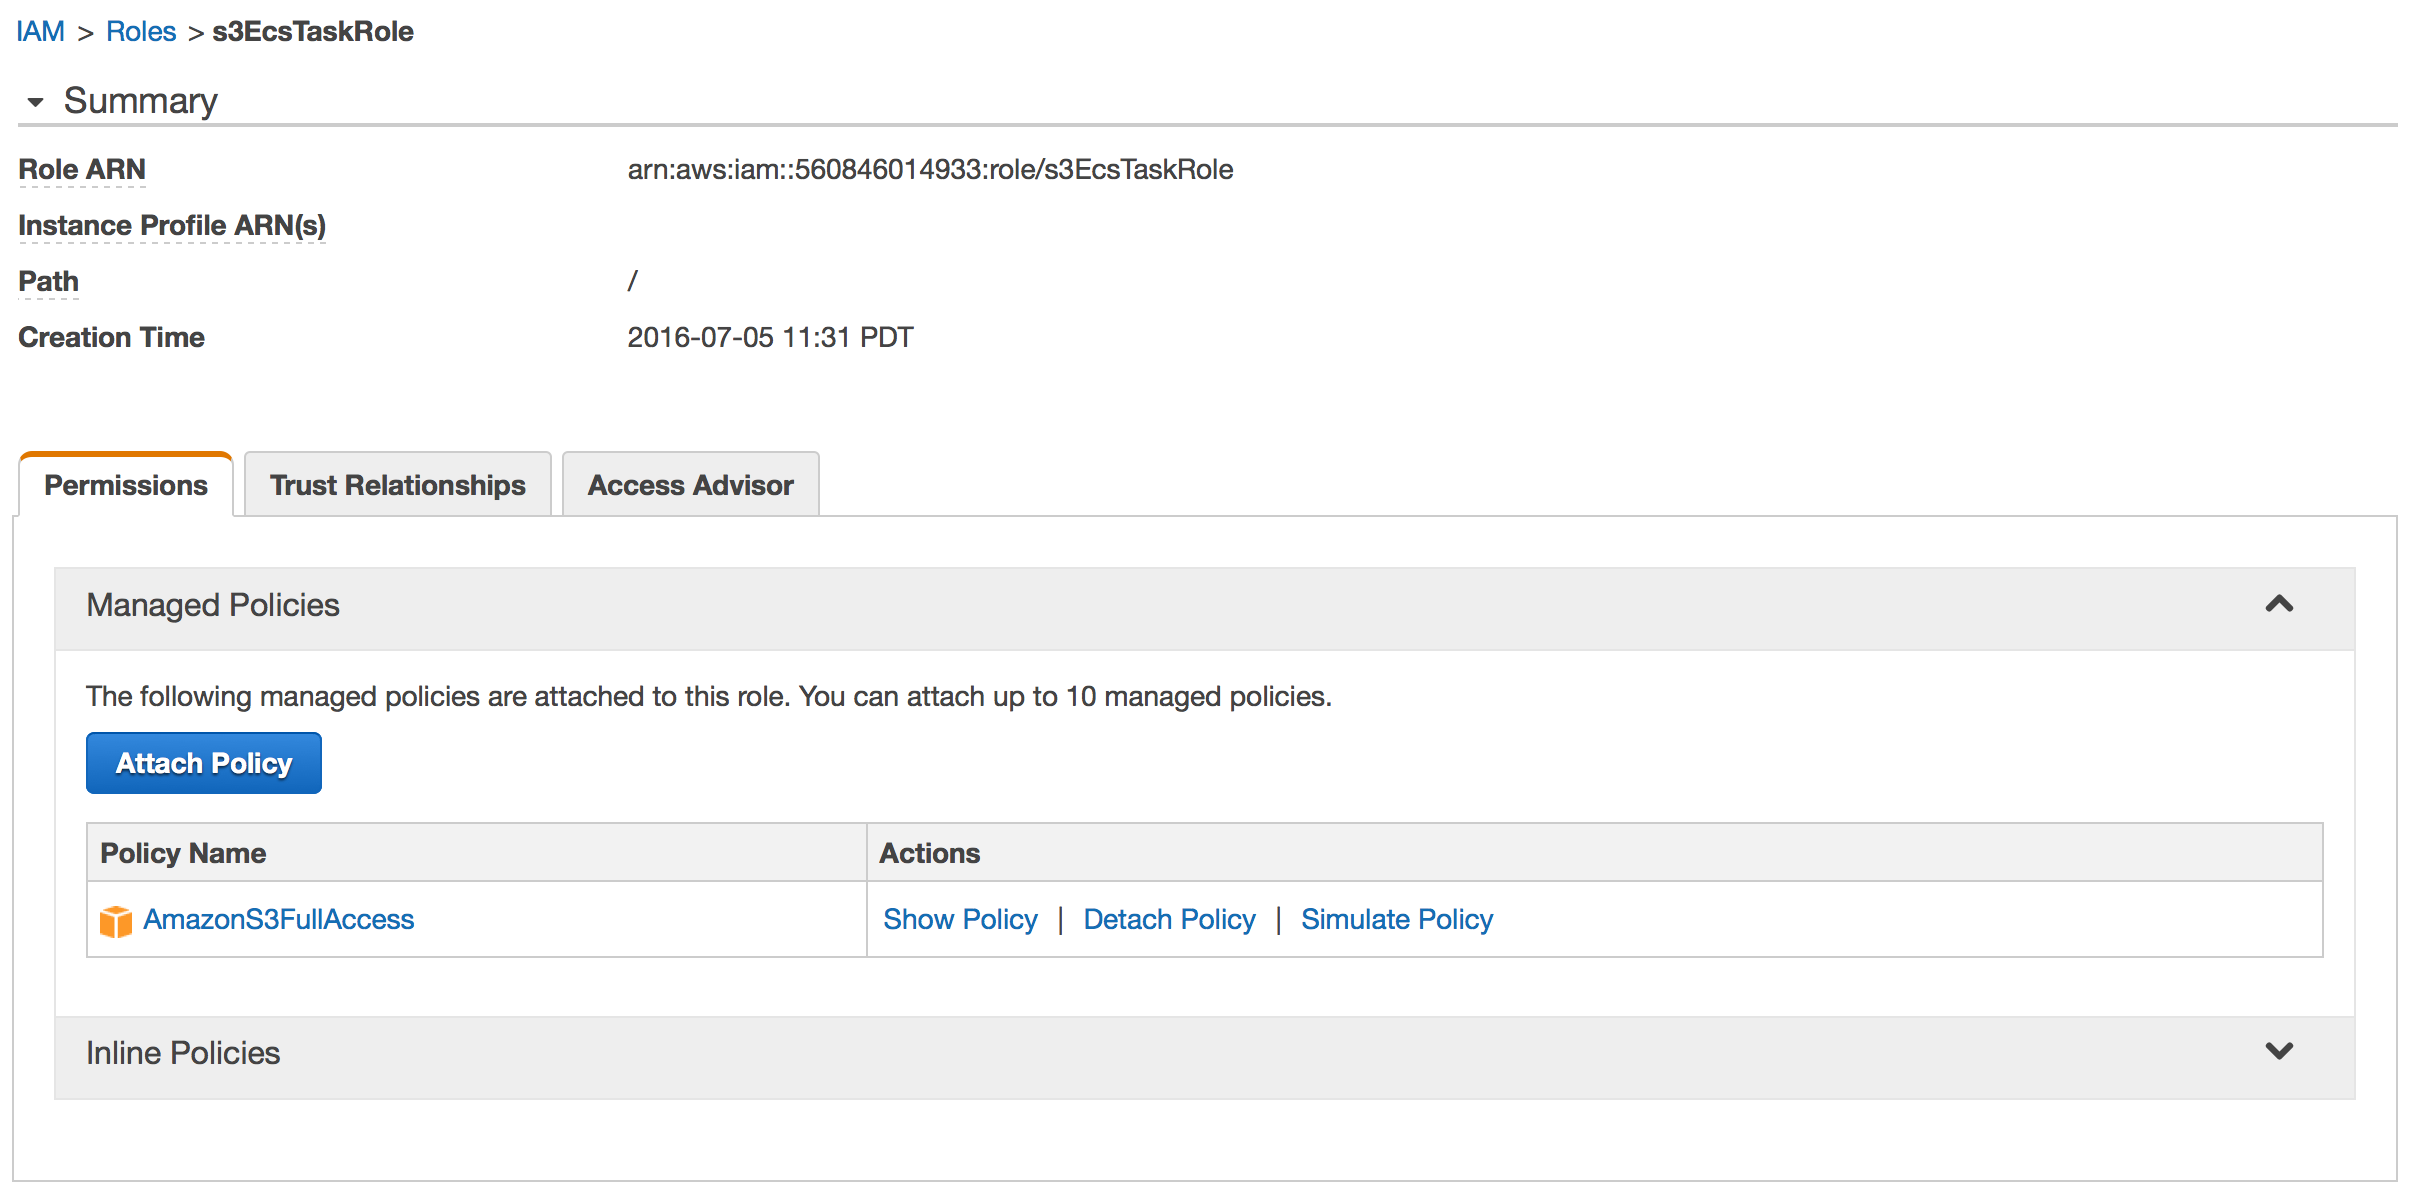
Create an IAM role for your task. For AWS Service Roles, choose Amazon EC2 Container Service Task Role and on the Attach Policy screen, choose the AmazonS3FullAccess IAM managed policy.
Create a task definition and launch a task
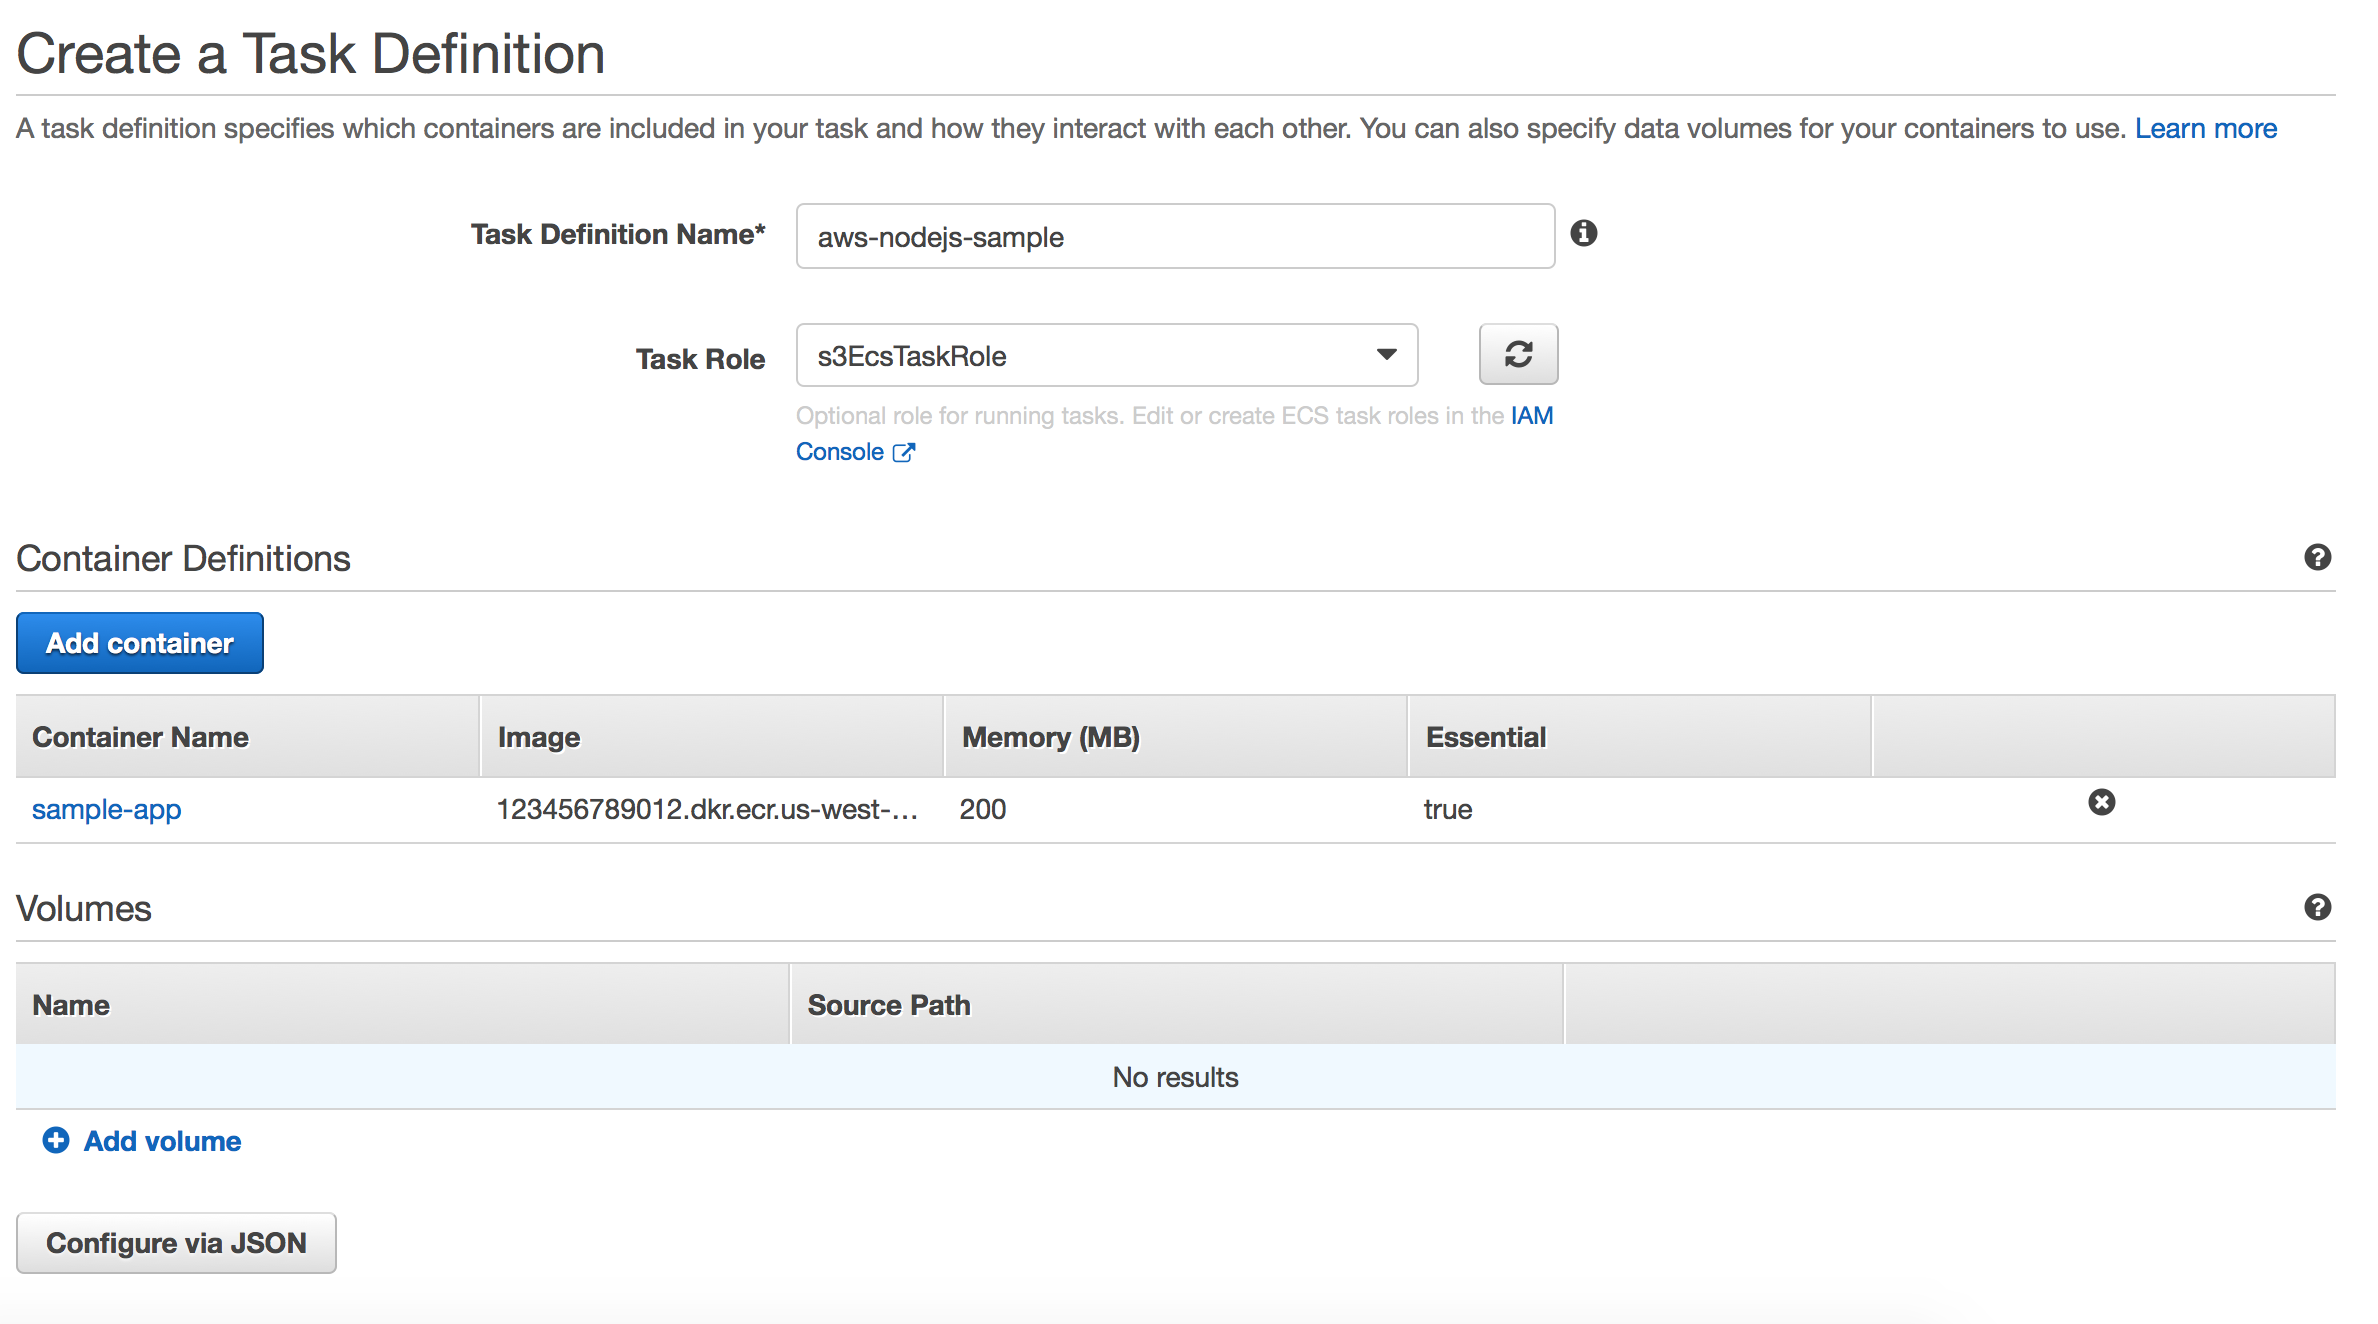
Create a task definition for the sample app. Switch to the JSON builder by choosing Configure via JSON and paste in the following text, making sure to replace the AWS region and account ID with appropriate values.{
"containerDefinitions": [
{
"name": "sample-app",
"image": "123456789012.dkr.ecr.us-west-2.amazonaws.com/aws-nodejs-sample:v1",
"memory": 200,
"cpu": 10,
"essential": true,
"portMappings": []
}
],
"volumes": [],
"family": "aws-nodejs-sample"
}
For Task Role, select the IAM role that you created before and choose Create to create the task definition.

On the Task Definition page, select the revision you just created e.g., aws-nodejs-sample:1 and choose Actions, Run Task. Select your ECS cluster from the list and choose Run Task on the next screen to launch a task on your ECS cluster.
Open the Amazon S3 console and verify that a bucket has been created and that it contains the
hello_world.txt file. The bucket name is in the node-sdk-sample-UUID format.Note: To avoid unexpected charges, make sure to empty and delete the S3 bucket and to terminate the EC2 instances created in the example above.
Conclusion
As you learned in the example above, it is easy to follow AWS best practices around IAM usage and only provide the least needed privileges to a task; thereby minimizing the risk of other tasks accessing data that they are not intended to access.This also simplifies ECS cluster management, as you now have more freedom in bundling your tasks together on the same cluster instances. Keep in mind that you still need to handle security groups on a per-instance basis but you can now be very granular when creating and assigning IAM policies.


0 comments:
Post a Comment