c. Edit and debug Cloud applications using IBM Bluemix DevOps Services Web code editor
1. Understand basic functionality of the Web code editor
A set of hands-on steps are provided to show some key concepts for the Web IDE.
Start Web Editor: In the IBM Bluemix DevOps Services project page, click EDIT CODE to access the source code of your application.

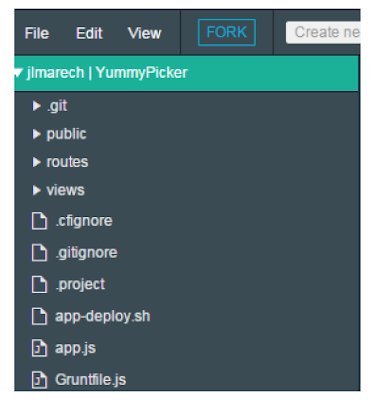
The files for your application source code are displayed on the left pane of the screen. The structure of the code depends on your programming language.
Edit existing code: To edit existing code, simply select the file from the left pane to open it. You can use the menu option (File --> Save) to save changes, but note that the web IDE also include an auto-save feature.

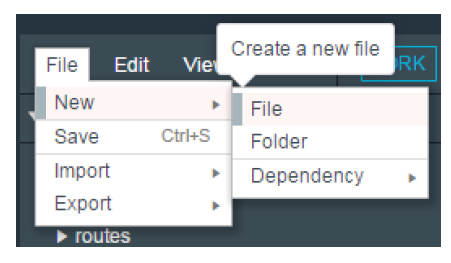
Create new file: To create new files in your project, select the File > New > File option. Then start adding code to this file. You also create folders to organize and group source files.
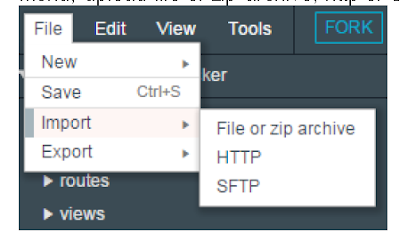
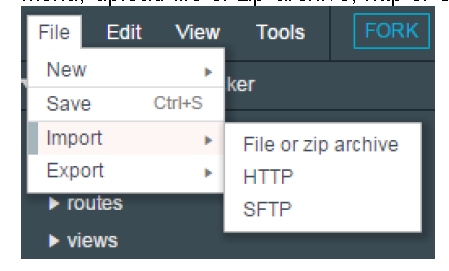
 Import existing code: To import code from your local environment or from another project, click on File -> Import and select one of the import options from the cascading menu, upload file or zip archive, http or sftp transfer.
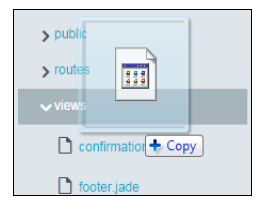
 You can also drag and drop files from your local disk to the IBM Bluemix DevOps Services project:
Fork existing projects: Another powerful option, if you don’t want to start development from scratch, is to leverage the Fork option. You can browse public Bluemix DevOps Services projects and if you want to reuse one of them, click the Fork button in order to create a copy in your environment.

Code editor syntax highlighting: The IBM Bluemix DevOps Services web editor provides syntax coloring support for multiple languages, including HTML, CSS, JavaScript, Ruby, and Python.
 For some languages, such as JavaScript, the Web IDE also supports syntax checking and code completion, both for standard language constructs and for the services that Bluemix provides. First type Ctrl-Space to activate code assist, then you can choose code snippets from the provided list

2. Using Live Edit to quickly make changes without redeploying an application
For advanced debugging and quick changes to application code, IBM Bluemix DevOps Services provides specific support for Node.js applications (only for Node.js at this time)
The first step to use the debug tools is to enable the Live Edit capability. Simply click the Live Edit button on the project page
 When activating Live Edit, you are asked to re-deploy your application. Click OK to accept.

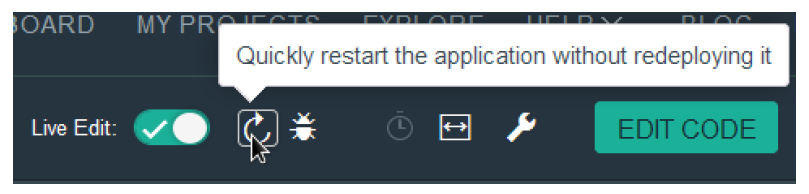
After the application redeploys, you can edit the application code in the web editor and push it into the running instance with a quick restart (instead of a full redeployment).

3. Enable debug mode to troubleshoot an application running in IBM Bluemix PaaS
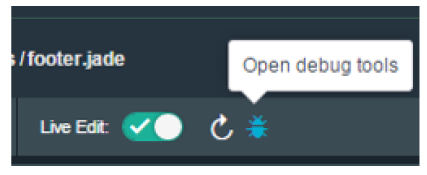
When in Live Edit mode you can also bring up an interactive debugger for Node.js applications. (Requires Chrome browser)
Click the debug button to enter the debugging page (you may be asked to log in again using your Bluemix credentials).

On the Bluemix Debugger page, click the Open Debugger button.

You now have access to an environment to set breakpoints, or inspect the call stack and variables.

1. Understand basic functionality of the Web code editor
A set of hands-on steps are provided to show some key concepts for the Web IDE.
Start Web Editor: In the IBM Bluemix DevOps Services project page, click EDIT CODE to access the source code of your application.

The files for your application source code are displayed on the left pane of the screen. The structure of the code depends on your programming language.

Edit existing code: To edit existing code, simply select the file from the left pane to open it. You can use the menu option (File --> Save) to save changes, but note that the web IDE also include an auto-save feature.

Create new file: To create new files in your project, select the File > New > File option. Then start adding code to this file. You also create folders to organize and group source files.
Fork existing projects: Another powerful option, if you don’t want to start development from scratch, is to leverage the Fork option. You can browse public Bluemix DevOps Services projects and if you want to reuse one of them, click the Fork button in order to create a copy in your environment.

Code editor syntax highlighting: The IBM Bluemix DevOps Services web editor provides syntax coloring support for multiple languages, including HTML, CSS, JavaScript, Ruby, and Python.

2. Using Live Edit to quickly make changes without redeploying an application
For advanced debugging and quick changes to application code, IBM Bluemix DevOps Services provides specific support for Node.js applications (only for Node.js at this time)
The first step to use the debug tools is to enable the Live Edit capability. Simply click the Live Edit button on the project page

After the application redeploys, you can edit the application code in the web editor and push it into the running instance with a quick restart (instead of a full redeployment).
3. Enable debug mode to troubleshoot an application running in IBM Bluemix PaaS
When in Live Edit mode you can also bring up an interactive debugger for Node.js applications. (Requires Chrome browser)
Click the debug button to enter the debugging page (you may be asked to log in again using your Bluemix credentials).
On the Bluemix Debugger page, click the Open Debugger button.
You now have access to an environment to set breakpoints, or inspect the call stack and variables.


0 comments:
Post a Comment